
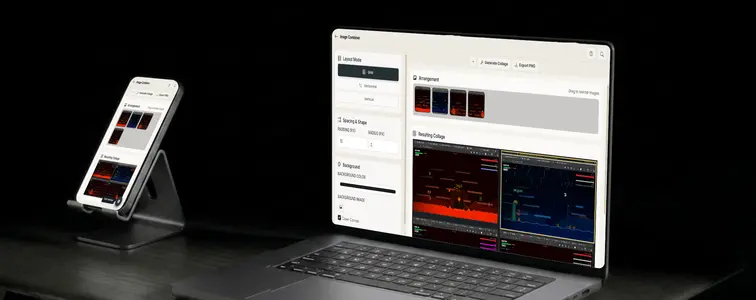
There is a certain kind of image task that sits awkwardly between "too simple for Photoshop" and "too annoying to do by hand." Combining several photos into one clean grid is exactly that. You could open an editor, create a new canvas, drag each image into a cell, and spend ten minutes fighting alignment guides. Or you can use a tool that treats a grid as a first-class layout instead of something you assemble by hand.
The Image Combiner in MockupTown is that tool. It takes a stack of images and lays them out into a grid, a horizontal strip, or a vertical stack, with full control over spacing, padding, corner radius, and background. The result exports as a high-resolution PNG. Everything runs locally in your browser, so your images never get uploaded anywhere.
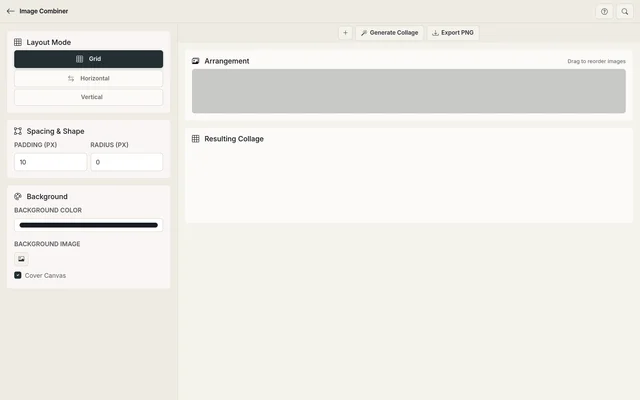 Image Combiner.
Three layouts cover almost everything
Three layout modes cover most of what people want:
- Grid. Images arrange into rows and columns. This is the mode for photo collages, contact sheets, and product grids.
- Horizontal. Images sit side by side in a single row. Ideal for before/after comparisons and wide banners.
- Vertical. Images stack in a single column. Good for phone screenshots, long-form sequences, and step-by-step guides.
Within a grid you control how many columns you want, and every image is fitted into a uniform cell. That detail matters more than it sounds. It means you can throw in photos of different sizes and resolutions and still get a tidy, aligned result instead of a patchwork of mismatched boxes.
From a stack of files to one image
1. Add your images
Open the Image Combiner and click the add button in the toolbar, or drag files straight onto the page. You can add images one at a time or select a whole folder at once. The thumbnails appear in the arrangement area, where you can drag them into any order. The order you see there is the order they will appear in the final collage, so put the hero image first.
There is no fixed limit on how many images you can combine. The practical ceiling is your browser's memory, which handles large batches fine on a normal machine, though a hundred 12-megapixel photos will take a moment to process.
2. Pick a layout
Use the sidebar to choose grid, horizontal, or vertical. If you picked a grid, set the number of columns to match the shape you are going for. Four square images read well in a 2x2; twelve images work nicely in a 3x4. The right choice depends on where the collage is going, so it is worth trying a couple of options.
3. Tune the look
This is where a decent collage becomes a good one. The sidebar gives you four controls:
- Padding (px). Space around the outside of the whole image. Defaults to 10.
- Radius (px). Rounds the corners of each image cell. Zero gives sharp corners, 12 or 16 gives a soft, modern look.
- Background color. Fills any area not covered by your photos. Defaults to a dark slate, but you can pick anything, including white or a brand color.
- Background image. Instead of a flat color, you can drop an image behind the collage and toggle "Cover Canvas" to have it fill the frame.
Small padding with white background reads like a clean editorial layout. Dark background with generous padding makes photos pop. Both take about two seconds to switch between, so experiment a little.
4. Generate and export
Click Generate Collage to render the result, check it in the preview, and then hit Export PNG to download. The export is full resolution, so it holds up for print, social, or a presentation without looking soft or pixelated.
The jobs that keep coming back
- Before/after comparisons. Stack two shots side by side to show a transformation, an edit, or a design iteration. Horizontal mode lines them up perfectly.
- Photo contact sheets. Combine dozens of photos into a single printable sheet for review, archiving, or client approval. One image instead of forty in an email.
- Social media collages. Build a simple marketing graphic or a product roundup without touching design software.
- Product catalog grids. Turn a folder of product photos into uniform grid images for listings, lookbooks, or an online store.
- Travel and event recaps. Merge the best shots of a trip into one shareable image. Friends can scroll one image instead of a whole album.
The difference between fine and good
The biggest quality jump comes from where you put the images, not how you arrange them. If your source photos share a similar aspect ratio, the grid looks far cleaner, because every cell gets filled consistently with minimal cropping. Mixing one landscape and one very tall portrait in the same grid works, but the tall one will get heavily cropped to fit the cell.
A consistent visual rhythm helps too. If you want a uniform collage, keep the spacing even, which the tool does automatically. If you want a looser, more editorial feel, raise the padding and set the radius so each image reads as a card.
Why your images never get uploaded
All processing happens in your browser on an HTML5 canvas. Your images are read locally and never sent to a server. For product photos, personal pictures, or anything you would rather not have sitting in someone else's cloud, that is the difference between this tool and most "free collage maker" websites.
What it does not do
The Image Combiner merges images. It does not add text, filters, or fancy effects on top. If you need captions on your collage, add them in any editor afterward, or pair the result with a design tool that supports text. And as noted above, very large batches of very high-resolution images can get slow simply because everything happens on your device. That is the trade-off for the privacy guarantee.
Make one and see
Next time you need two photos side by side or a dozen photos in a tidy grid, skip the manual canvas setup.
Open the Image Combiner, drop in your images, pick a layout, and export the finished collage in under a minute.
Made with MockupTown, the free all-in-one mockup generator.
Frequently asked questions
How many images can I combine?
There is no fixed limit. The only constraint is your browser's available memory.
Can I combine images of different sizes?
Yes. Images are fitted into uniform cells based on your chosen layout, so mixed sizes work fine.
Are my images uploaded to a server?
No. Everything is processed locally in your browser using the HTML5 canvas. Your images never leave your device.
What layouts are available?
You can combine images into a grid, a horizontal strip or a vertical column, and control the column count and cell aspect ratio.