
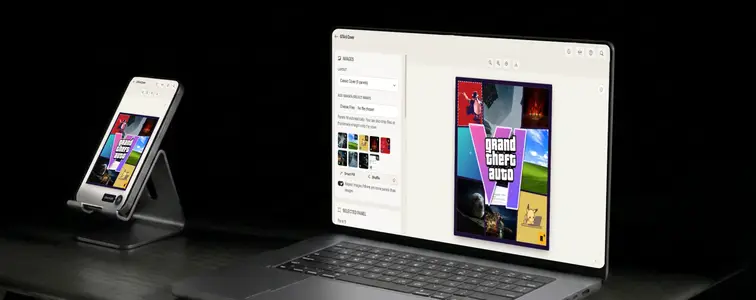
Some images are instantly recognizable before you read a single word on them. The GTA VI cover is one of those: a dense collage of characters and scenes, split into angled panels, with a huge gradient VI sitting on top. It looks complicated, but it follows a simple recipe, and that recipe is exactly what makes it fun to recreate with your own photos.
The GTA 6 Cover Generator in MockupTown builds that structure for you. You add your images, pick a layout, and the panels, slants, logo and export are handled automatically.
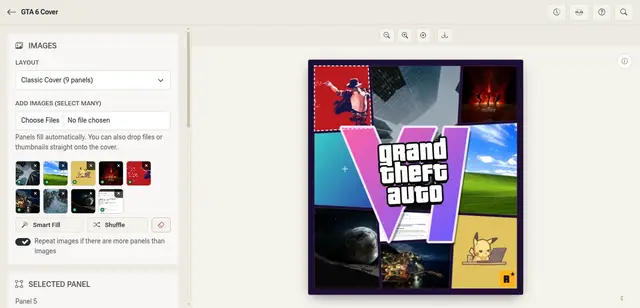 Image list and panel controls on the left; the live cover preview on the right.
What makes the cover work
Before you start, it helps to know what you are copying. The look comes down to a few ingredients:
- A collage of panels. Many different scenes share one canvas, so the eye keeps finding something new.
- Slanted shared edges. Where two panels meet, the border tilts, and both panels follow the same tilted line so the gap stays even.
- Straight outer edges. Panels that touch the frame stay flat against it. Only the borders between panels lean.
- A big gradient logo. The VI sits in the center, with the title stacked in white letters with a heavy outline.
- A dark frame. A deep purple border holds everything together.
The generator follows the same rules, which is why the result feels right even before you change any settings.
Choosing images that work
A collage is only as good as its pieces. A few habits make a big difference:
- Use variety. Mix close-ups, wide shots and action. If every photo is a similar framing, the panels blur together.
- Lead with a strong subject. The largest panel gets the most attention, so put your best photo there.
- Keep the color feel consistent. Photos with a similar warmth or contrast look like one set. A quick edit before you upload goes a long way.
- Do not worry about sizes. The generator downsizes large photos so exporting stays smooth.
You do not have to place anything by hand. Add all your photos at once and each one goes to the panel whose shape fits it best. Portrait photos land in tall panels, wide ones in wide panels, and the most visible panels are filled first. Portrait photos are also cropped toward the top, so faces stay in frame. If you have fewer photos than panels, the generator repeats them to fill the gaps, and Shuffle gives you a different arrangement with one click.
Layouts, slant and gap
You can start with the classic nine-panel cover, or pick a 3x3, 2x3, 2x2 or hero layout. Every layout is a real grid first, and the slant is applied afterward to the lines panels share. That is why neighbors always fit together, and why the outer edges against the frame never tilt.
Three controls shape the final feel:
- Slant controls how far the shared borders tilt. A small angle looks close to the original, and a bigger one looks more dramatic.
- Panel gap sets the width of the spacing between panels. A thin gap reads as a clean collage, and a wide one looks more like separate stickers.
- Slant direction switches between alternating tilts, which looks closer to the real cover, and parallel tilts, which looks more orderly.
Fine-tune every panel
Automatic placement gets you most of the way. For the last few percent, click any panel to select it:
- Drag to move the image inside the panel.
- Scroll to zoom in or out.
- Drop a file or a thumbnail on a panel to replace what is in it.
- Hold Shift and drag one panel onto another to swap them.
- Use the sliders in the Selected Panel section when you want exact numbers.
Empty panels show a colored placeholder, and clicking one opens the file picker, so you can fill the cover one image at a time as well.
Make the logo yours
The big VI uses a gradient that you can recolor from top to bottom, and the title is just text, one word per line. You can change the text color, the outline color and the size of the whole logo, or hide the logo completely if you only want the collage. A small corner badge can be turned on or off, and the frame color is yours to choose, so you can match it to your photos.
This is also where personal covers come alive. Rename the title for a trip, a birthday, a team or a channel, and the same design becomes something that belongs to you.
Export and privacy
When it looks right, download the cover as a PNG. It exports at twice the on-screen size, so it stays sharp when you post it or print it. Pick the cover ratio for posters and profile art, or the square format for feeds.
Everything is drawn in your browser, and your photos never leave your device. That matters when the images are personal, such as friends, family or private screenshots.
One note on what this is: it is an independent fan tool for making your own artwork and mockups. It is not affiliated with or endorsed by Rockstar Games or Take-Two Interactive, so present your covers as your own creations and not as official material.
The next time you want a striking image from a handful of photos, open the GTA 6 Cover Generator, add your images, tweak the slant and download a cover that looks the part. Free, no signup.
Made with MockupTown, the free all-in-one mockup generator.
Frequently asked questions
How much does the GTA 6 Cover Generator cost?
It is free to use. The tool runs in your browser, so there is nothing to install and no signup.
How many images can I add?
As many as you like. The classic cover has nine panels, and any extra images stay in your image list so you can drag them onto a panel later.
Are my images uploaded anywhere?
No. Everything is processed locally in your browser, and your photos never leave your device.
Can I change the title and logo colors?
Yes. Edit the title text, the text and outline colors, and the top and bottom colors of the VI gradient. You can also resize or hide the logo.
What file do I get?
A high-resolution PNG, available in a cover ratio or a square format.