
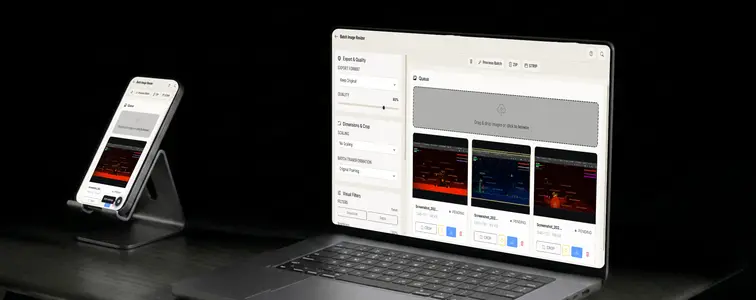
You know the feeling. A folder full of photos, all of which need the same thing: resized to the same width, maybe cropped to the same shape, compressed for the web, or stamped with a watermark. None of it is hard. All of it is tedious, because it means opening each image in an editor and doing the same six clicks over and over.
The Batch Image Resizer in MockupTown does the six clicks once and applies them to the whole folder. Resize, crop, filter, watermark, border, convert. You configure the batch, hit process, and get a ZIP of finished images. Everything runs in your browser, so nothing gets uploaded.
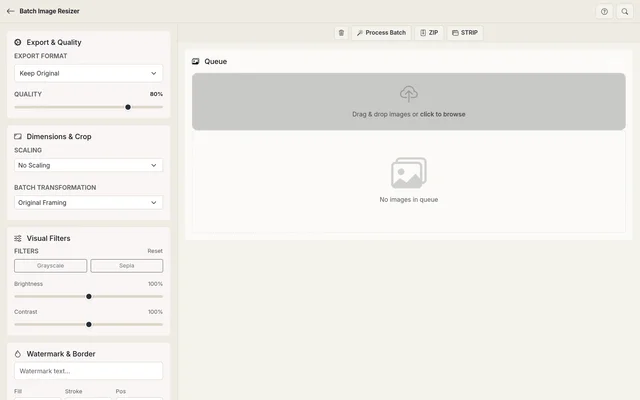 Batch Image Resizer.
Configure once, apply to everything
1. Drop in your images
Open the tool and drop a whole folder onto it, or select multiple files. There is no per-image setup. The tool works from whatever you give it, and you can add more images to the queue as you go.
2. Set the format and quality
Every image in the batch gets the same export treatment. The format can stay as the original, or you can force everything to JPEG, PNG, or WebP. The quality slider defaults to 80 percent, and it is the dial you want when you are balancing file size against how the images will be used.
WebP is the quiet star here. If you are preparing images for a website, converting a folder of JPGs to WebP at moderate quality typically cuts file size dramatically with no visible difference. For print, keep PNG or a high-quality JPEG instead.
3. Resize
The scaling options cover the common cases. Scale everything by a percentage, or pin the width or height to a fixed pixel value. Pinning the width is the one most people reach for, since it is the fastest way to make a folder of photos uniform for a blog, a listing, or a gallery.
There is no scaling option if you do not need one, in which case images keep their original dimensions.
4. Crop for consistency
This is where the tool does something cleverer than a basic batch resize. Three crop modes:
- Original framing. Nothing is cropped.
- Auto ratio. Every image is center-cropped to a fixed ratio, 1:1, 4:3, 16:9, or 9:16. Great for forcing a mixed folder into one shape for a listing or a slider.
- Master Frame. Crop one image the way you want it, apply it to the whole batch, and every other image gets the same relative framing. This is the mode for product photography where every shot needs the product in the same position with the same zoom.
The Master Frame is worth a moment of appreciation. You frame a single image, click to apply, and the same zoom and position carries across the entire queue. For a catalog of fifty products shot from slightly different angles, it turns an evening of manual cropping into a two-minute job.
5. Filter, watermark, and export
The batch filters are simple and blunt, which is the right call. Grayscale and sepia are one click. Brightness and contrast have sliders with live previews. Whatever you set applies to the whole folder, which is exactly what you want for a cohesive set of images.
For watermarks, you get a text watermark with color and position presets, plus a stroke option that keeps it readable against busy backgrounds. This is the difference between protecting a portfolio and making it ugly. A small, low-opacity watermark in a corner is the classic safe choice. Then there is an optional border for a consistent frame around every image.
When you are happy, click Process Batch. The tool renders everything and hands you a ZIP, or you can review the results in the Strip view first to catch anything that went wrong before you start downloading.
The people who need a batch pass
- Product photography. A folder of shots becomes a set of uniformly framed, watermarked images ready for store listings.
- Web optimization. Large camera exports become WebP files scaled to the exact width a page needs, which is a real page-load win.
- Photo cleanup. A holiday or event folder gets grayscale, brightness, and contrast tweaks applied in one pass instead of per photo.
- Portfolio watermarking. A full gallery gets the same watermark in the same place on every image.
- Batch conversions. An entire folder moves between PNG, JPEG, and WebP with quality control, no quality loss from repeated manual saves.
What real batches teach you
The Master Frame and the filters are global by design. That is the point of a batch tool, but it means one bad setting affects every image. Preview a couple of images in the Strip view before exporting the whole batch. Catching a misaligned watermark after ZIP download is annoying; catching it in the preview takes one second.
Quality and memory also matter at scale. Rendering a few hundred large images in the browser takes real time and memory. If your folder is enormous, process it in a couple of chunks. And remember that quality is a one-way street: converting to JPEG or WebP discards data, so if you might need originals later, keep a copy of the folder before you convert.
No uploads, by design
No uploads, no server round-trips. Your images are read and processed entirely in your browser. For product shots, client work, or personal photos you would rather not hand to an anonymous batch service, that is the whole point.
When the folder is ready
The next time a folder of images needs the same treatment, skip the open-edit-save routine.
Open the Batch Image Resizer, drop in your folder, set the batch settings once, and download the finished set.
Made with MockupTown, the free all-in-one mockup generator.
Frequently asked questions
Are my images uploaded to a server?
No. All processing happens inside your browser. Your images never leave your device.
What is the Master Frame?
Frame one image with the crop tool, click "Apply to All", and that exact relative framing (zoom and position) is applied to every image in the queue, perfect for consistent product shots.
Which output formats are supported?
You can keep the original format or convert everything to JPEG, PNG, or WebP with adjustable quality.
Can I scale by width and height?
Yes. Scale the batch by width, by height, or by percentage, depending on what your project needs.