
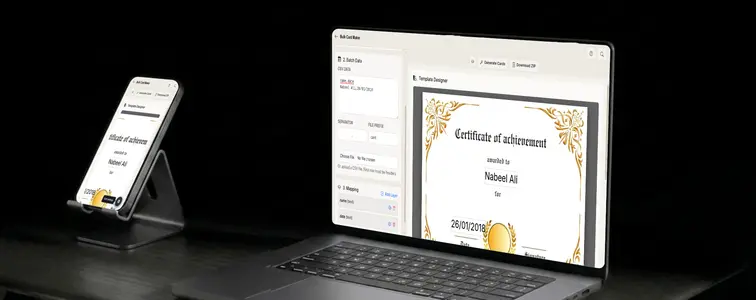
There is a moment every event organizer, trainer, or school coordinator knows: the course is done, everyone passed, and now fifty certificates need to exist. Each one with the right name, the right course, the right date, and ideally a way for anyone to check it is real.
Making those one at a time in a design tool means fifty rounds of copy, paste, export, rename. It is not hard work, exactly. It is just slow, and it is exactly the kind of repetitive work a computer should do.
Bulk Card Studio in MockupTown is the tool for this. You design the certificate once, bring the list of participants, and it renders a finished certificate for every row. Here is how a real certificate run looks, start to finish.
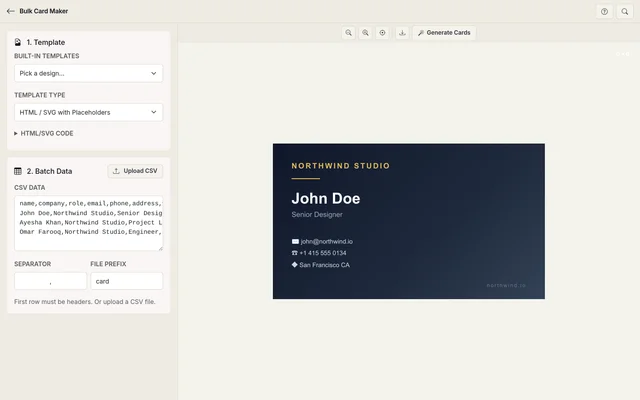 Bulk Card Maker.
What a certificate batch needs
Every batch of certificates has the same shape: one fixed design and a list of data that changes per person.
The fixed part is the certificate itself: the border, the heading, the logo, the wording of the award, the signature. The changing part is the per-person data: the name, the course or program, the date of issue, and often a serial number or verification code.
So the whole job reduces to three steps: build the template, load the list, and map the fields that vary onto the design.
1. Build the certificate template
Bulk Card Studio gives you two ways to build a template, and either works for certificates.
The image route. Upload a finished certificate background in JPG, PNG, or WebP. The tool shows it on a canvas, and you add layers on top for the parts that change from person to person: the name, the course title, the date, a verification code. You drag each layer into position and adjust size, color, and alignment right on the canvas.
The HTML route. Paste markup that uses {{field}} placeholders, like <div>{{name}}</div>. When you generate, each placeholder is replaced with that person's data. This route is great when a certificate has an intricate layout or you want precise control over fonts and spacing.
You do not have to write that markup yourself. Describe your certificate to ChatGPT, Claude, or any LLM and ask it to output HTML or SVG with the right placeholders in place. A prompt as short as "HTML certificate template with {{name}}, {{course}}, and {{date}} placeholders" gives you a starting design you can paste into the code box and refine until it matches your branding.
Because the template is plain HTML, the styling is normal CSS. That means real fonts too: load a serif like Playfair Display for an elegant award, or a clean geometric sans for the name, and every certificate in the batch uses it, with no font installation required.
The template can also transform your data as it renders. Small function placeholders swap a column value for a graphic: {{qr:verify_url}} turns a URL into a scannable QR code, {{barcode:serial}} renders a barcode from a serial number, and {{image:signature}} drops an image URL column into the layout. Drop them inside src="" and they behave like pictures.
There are also built-in templates for the common certificate layouts, so you do not always have to start from a blank upload.
2. Bring the participant list
The list is a CSV, one row per person. The first row holds the column headers, and every header becomes a field you can use in the design. A certificate list usually looks something like:
name,course,date,serial,verify_url,signature
John Doe,Advanced Photography,Aug 12 2026,CRT-1001,https://example.com/verify/1001,https://example.com/sig/jdoe.png
Jane Smith,Advanced Photography,Aug 12 2026,CRT-1002,https://example.com/verify/1002,https://example.com/sig/jsmith.png
You can paste the CSV into the text area directly, or upload a .csv or .txt file. The tool lets you set the separator if your data uses a tab or semicolon, and a file prefix for the exported images, which is handy when every school or event needs its own naming scheme.
Two quick notes from running real batches: keep headers short and without spaces, since they become the field names you map in the next step, and make sure every row has the same number of values. A missing value quietly shifts everything after it.
3. Map the fields onto the certificate
This is the step that does the work. You add a layer to the canvas, pick which CSV column feeds it, and choose what kind of layer it is:
- Text. Names, course titles, dates, serial numbers. Set font size, color, weight, and alignment. This is the layer type you will use most.
- QR code. Any column holding a URL becomes a scannable verification QR on the certificate. This is the modern replacement for a serial number: a recipient (or an employer) scans the code and lands on a page that confirms the certificate is genuine.
- Barcode. The same idea in a linear format, useful when certificates are scanned by a machine or logged into a system.
- Image URL. If a column holds URLs, that column becomes a picture layer. This is how you drop an electronic signature or a scanned seal onto each certificate without it appearing in the wrong place.
Every layer sits exactly where you drag it, and you can preview any individual record to check alignment before exporting anything. Long names, in particular, are obvious in preview long before you waste a batch of exports on them.
4. Generate and export the batch
When the preview looks right, hit generate. The tool renders every row in your list and shows you the finished batch as a grid of previews. From there you download the images as PNGs, or bundle the whole set into a single ZIP.
For a typical certificate run, the ZIP is the move: one file contains every participant's certificate, named with your prefix and a zero-padded number, so it sorts cleanly and maps back to your list.
The certificate-specific touches
A few things matter more for certificates than for other card batches:
Verification codes. If the certificates need to be checkable, add a verify_url column with a unique link per person and map it to a QR layer. The QR replaces printing a twelve-digit code under the signature, and it reads cleanly off paper.
Signatures. Signature scans are usually small, transparent PNGs. Load them through an image URL column, or bake the same signature into the background template if it is identical on every certificate. If signatures vary per certificate, the image layer is the way.
Room for long names. Names and course titles vary wildly in length. Check the longest values in your data during preview and size the text or the certificate accordingly. Text that overflows in preview will overflow in every export.
Why this stays on your machine
Certificate lists are full of names, and sometimes IDs or contact details, which is exactly the kind of file you do not want sitting in someone else's cloud. Bulk Card Studio does all the rendering in your browser, so the template and the CSV never leave your device.
Run your first batch
The next time someone needs certificates for a training, a webinar, a competition, or a graduation, it is no longer an afternoon of copy-paste.
Open Bulk Card Studio, upload your certificate template, paste your participant list, and export the whole batch as a ZIP in a couple of minutes.
Made with MockupTown, the free all-in-one mockup generator.
Frequently asked questions
What can I create with the Bulk Card Maker in MockupTown?
Certificates for courses, ceremonies and events; employee and organization ID cards; event badges; school, university and college cards; and social media posts, banners and share previews for marketers and web developers. Anything that repeats the same layout with different names, photos, QR codes or messages - each one personalized from its own CSV row.
How does CSV mapping work?
Upload a CSV with one row per card. Columns become placeholders you drag onto your template. When you export, each row is rendered into its own card.
What file formats are supported?
Templates can be PNG or JPG images. You can add per-card images from a second column, and export everything as PNG files or a ZIP archive.
Are my files uploaded anywhere?
No. Everything runs in your browser. Your templates and data never leave your device.